
What you see here is the result of working six months at a time for four winters, starting in fall of 2004 thru the spring of 2008 when the kids moved into the building. In addition there was some time spent in preliminary planning and engineering before we started construction.

The University of Navojoa (a Seventh-day Adventist campus) was kind enough to give us a site build the orphanage in an adjacent field...

We measured out the rectangular lot that was 100 meters by 200 meters... 5 acres.

And the president of the university was on hand to participate in the ground breaking ceremony, and prayed that the Lord would keep us all safe as worked on this project.

We started to get serious about doing this early in 2004 and I made a commitment to design and manage the construction of a new orphanage if Bob Mason could find a new location to build it. The current orphanage where Bob and Annette had built and housed about 30 kids was on property that was very low... it had very poor drainage for septic systems... sewage would surface above ground and crop dusters were spraying on adjacent fields. It was a very poor environment to have to live in.
So we started to dream about what a new facility would look like.
In all of the previous projects that I have built I had a hand in charting the style and character of buildings. I wanted to look like it belonged Mexico, but I really had very little understanding of what Mexican architecture really looked like. In Canada when a house has red tile roof and white stucco arches we call that Mexican. But reality is there is much more to it... and the Mexicans today are trying very hard to look more American... much more modern.
Sitting around a kitchen table in Bob and Annette Mason's house we started to make some plans of what a new orphanage might include and what shape it might take. We had visited a very interesting town east of Navojoa in the state of Sonora called Alamos. It was a silver mining town in the old days and there were some very cool haciendas that were built on large lots with most of the rooms facing into a central courtyard. Today some of them are used as restaurants or other businesses.
I liked the character of these old mansions and thought how cool it would be to have several apartments surrounding the courtyard. The concept that seemed to work with the past orphanage was to have a house with up to eight children living with the supervision of a married couple or a single mature woman... a mother type. Each house had "house parents" to take care of the children. And if we designed it new facility it would need four apartments, each with up to eight kids. We would then have a central kitchen and dining room where they would eat. We needed to have another apartment where the director would live... and a couple of extra apartments where volunteers who came to help out could live. There were often student volunteers who would come and spend between six to nine months and work with the children. Some students came from Germany... others from Canada and the USA. It gave them a chance to learn Spanish and those kids got a real practical life experience that was quite valuable.

So the design that we settled on had four residences on the main floor, plus a multipurpose room, that had a library and other media, computers, etc... and an office for the director. To the rear of the building was a workshop/storage room and a large dining room and kitchen.
The was no building over the workshop, dining and kitchen... but on the second level there was the directors apartment, and four other volunteer apartments, plus a bodega that kept the supplies that were donated for the orphanage... all the clothes, toiletries, linens and whatever were stored in a room above the multipurpose room below.

In addition to the orphanage we provided some RV services for the volunteers who came to help with construction, or those who might want to come back after to spend some time here with the kids. There was a RV washroom with a laundry room, and services for 11 RV's.

We started with the bodega (workshop) as we needed a place to keep out tools and supplies to build the orphanage. We did a monolithic pour, doing the footings, foundation and slab all in one continuous pour.

When our new adobe block making machine arrived it drew a lot of attention. How was this machine going to make adobe blocks?

We could make up to eight adobe blocks per minute... and we could vary the width of the blocks to suit. They were always 4" thick and 14" long... and we could adjust the width between 4" to 10".
Our basic standard block was 4' x 14" x 8 or 9" like the one coming off the machine in this photo.

We developed a way to use adobe blocks to form the footing and foundation walls. With this system we would put in all the plumbing, backfill to the slab base height, compact it...

and then place the rebar and tie it in place. Here we have three women tying the rebar... Shirley, Gail and a high school student.

Once the concrete pumper truck showed up, we placed all the concrete for the footings, foundation and slab in about three hours. It was a thing of beauty.

Here Mark Albrecht is doing the finishing. By the end of the afternoon the whole job was finished.

As the blocks came off the adobe machine, stacking them is not easy work, but Shirley took a turn when we were short handed.

Soren is making the first buttress on the bodega.

The bodega is reaching the top.
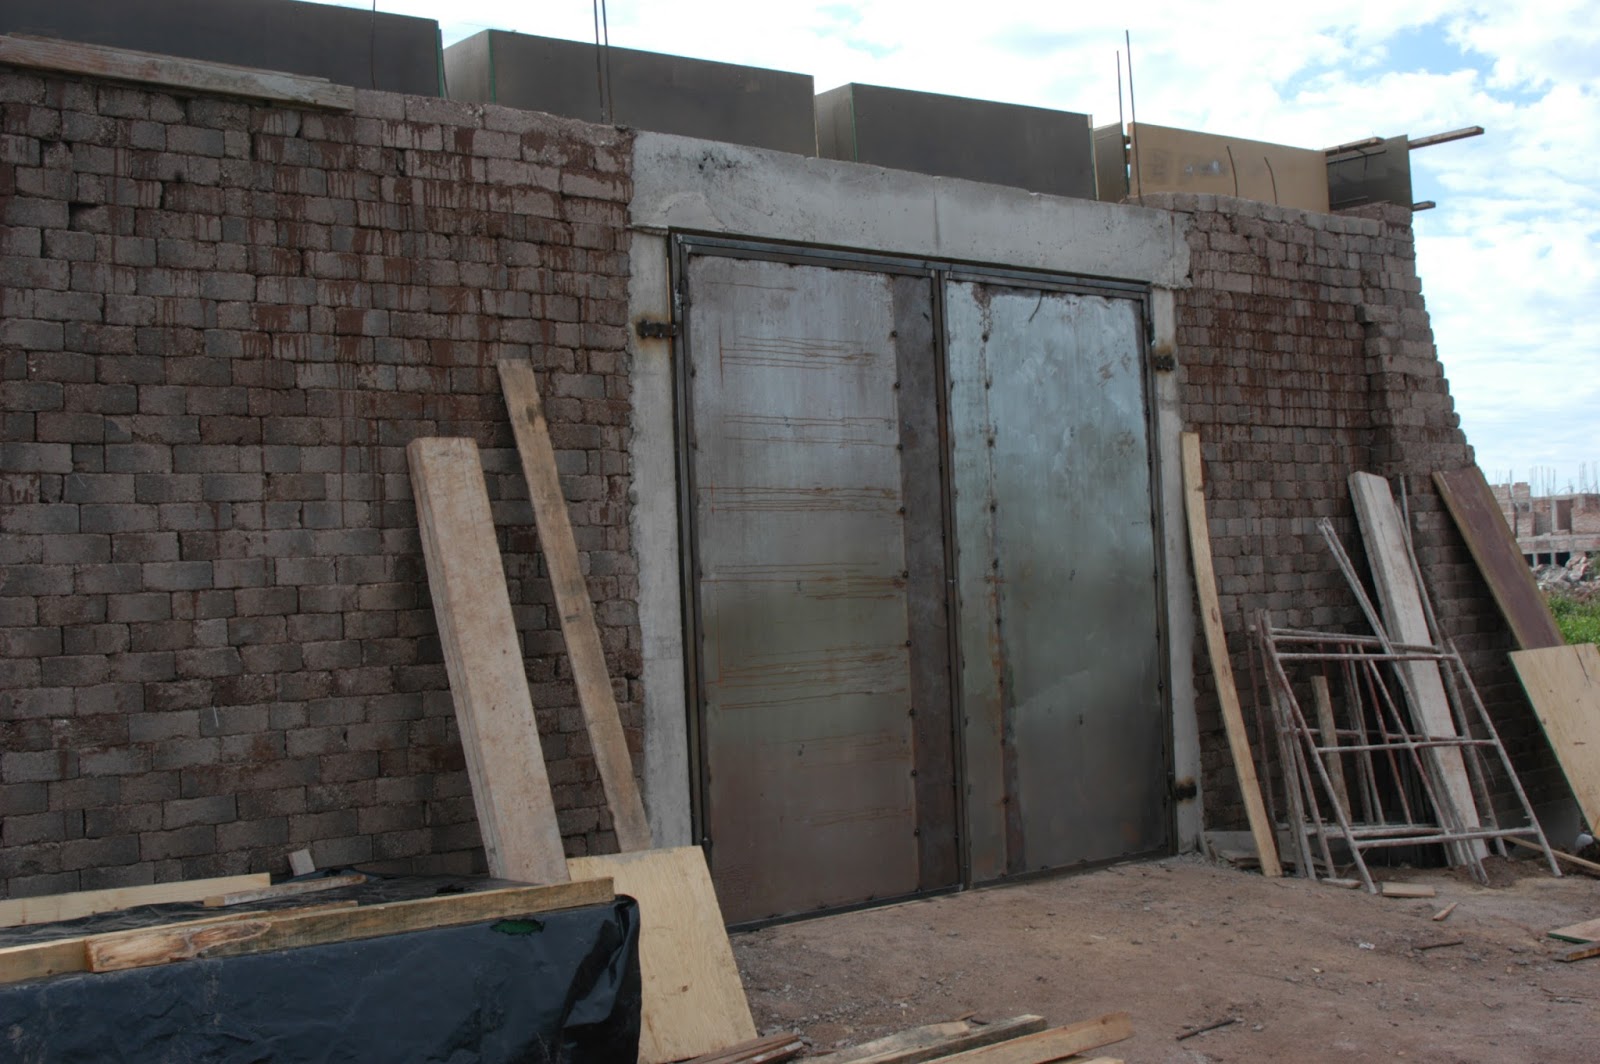
Once the metal doors were installed we were one step closer to using our bodega for storing our tools.

From the roof of the bodega we had a great view of the first two apartments for the kids.

As we built the walls we ran conduit in the adobes and put in the receptacle boxes so later we could pull electrical wires thru for the plugs, lights and switches.

When a group of volunteers came from Sedgwick, Alberta we really got a lot work accomplished.

The Sedgwick group paused for a parting photo in front of the orphanage... there was 25 of them.

We created a waffle grid of concrete beams between the styrofoam to make the ceiling above the first two apartments. The styrofoam stayed in place after the forms were removed.

Some days we had lots of spectators from the nearby students... curious about what was happening.

We got pretty good at placing and finishing concrete.

We used a battery operated vibrator to help remove the air bubbles in the concrete... and here Bob Mason, the director of the orphanage is helping me give instructions to Linker so he could use it. Linker was one of the best students to help me, and he worked all four years. He became the only Mexican who we allowed to operate the block machine, and he was good with the tractor and loader.

On the same day that we placed the concrete on the roof, we also had another slab ready to go and we made the mistake of doing them both on the same day. BIG MISTAKE.

With only volunteer workers, it was too much, and my paid Mexican workers left at 4:30 pm. I was in trouble as in another hour or so it would be dark.

Benjamin, the campus architect and facilities manager came and asked how it was going. I told him I was in trouble. Could he find some helpers for me? In 15 minutes he was back and not only helped himself...

but he rounded up twenty college students who set up lights and brought extra trowels.

I was dragging my tail feathers so bad, they sent me home and told me that they would finish the job for me. They did a pretty amazing job. That day we placed and finished about 120 cubic yards of concrete. No one in their right mind would ever try to do that much. It was crazy.

It was interesting to watch the crops around the orphanage grow. This was a field of garbanzos the were flood irrigated. The land here was very flat and level.

We developed a corner guide to help us keep the walls going plumb in both directions and just move a strip guide up as we went along. With non-professional workers it had to be very simple for them to use.

Even Shirley took a turn occasionally placing blocks in the wall, although she was the main operator of the adobe machine and was very good at making blocks.

In the second year we built the second story apartments for the volunteers.

We also built apartments 3 & 4 for the orphans.

As the dining room walls went up we added a fireplace in the center.

It was the first time I had ever built a fireplace, but we got the flu liners, fire bricks and damper from Tucson.

We built the concrete kitchen countertops right into the wall, so we didn't need to build any cabinets.

I found a local concrete sink and monument maker who quoted doing all the kitchen countertops with sinks, and all the bathroom vanity tops.

Once we completed the walls over the countertops, they were in place for ever.

I had brought several heart shaped rocks from Canada... and we put one into each countertop in the kitchen and vanities.

We also built an RV washroom & laundry room plus six cairns with electrical and water, with sewer hook-ups.

To make the dining room ceiling we had to support it all on rows of posts.

It took many rows of posts in the kitchen and dining room to pour the concrete all at one time.

The huge span in the dining room required a beam ten inches wide and 24 inches high.

Scuppers take the water off the roof.


Putting stucco on the parapet on the roof over the dining room and bodega.

By the end of Year 3 we completed 95% of the adobe blocks in this building... 165,000 blocks. We set records in making 20,000 adobes in one week, placing an average of 4,000 blocks a day, all with volunteers. In one week we built the directors apartment and finished a volunteer apartment.

Occasionally we got heavy rains, and this clay base soil got real greasy. It took several days of bailing out the water and lots of sunshine to dry things up again.

Eventually we got the courtyard prepared and ready for concrete.


I made plywood forms for the arches and in the centre of each post a downspout was installed.

There were 24 arches... six on each side of the courtyard.

Shirley worked on at least 13 of the 24 arches... and in this picture with her friend Gail they put in the last block finishing the arches. She said it was her most rewarding task. It was amazing how all these arches were built with volunteers who had no previous masonry experience... and yet the accuracy of these arches surpassed most of the block work in this project. It was amazing!

We built the septic tanks of blocks and parged the inside. Volunteers built two 1,200 gallon tanks.

We poured the lid of concrete and made access hatches. Then connected the outlet to the drain field.

The percolation rate was so bad we dug the trenches double deep and put in double rock to increase the absorption area.


Teaching the Webber University volunteers how to do put the waterproof membrane on the rooftop.